Search
- SK
- Barak Zahavy
- Gunjan Bhardwaj
- Patricia Wanninger
The Search screen is the first tab the user encounters once inside the SCSB application. Search is not restricted and is available to all users of the SCSB system. The Search tab allows users to search for records using various criteria. It also allows users to export the search results and request the titles (with appropriate permissions). Clicking on the hyperlinked title allows the user to view the MARC format of the bibliographic record.
SCSB Search
The SCSB Search bar is where the user enters the search text and chooses an index if desired. . The three different buttons in the SCSB Search are Search, Reset Search and Show Facets. The Search button is used to submit the search text and other information to bring up the results. The Reset Search button clears all choices including any facets and index selected and returns to the defaults.
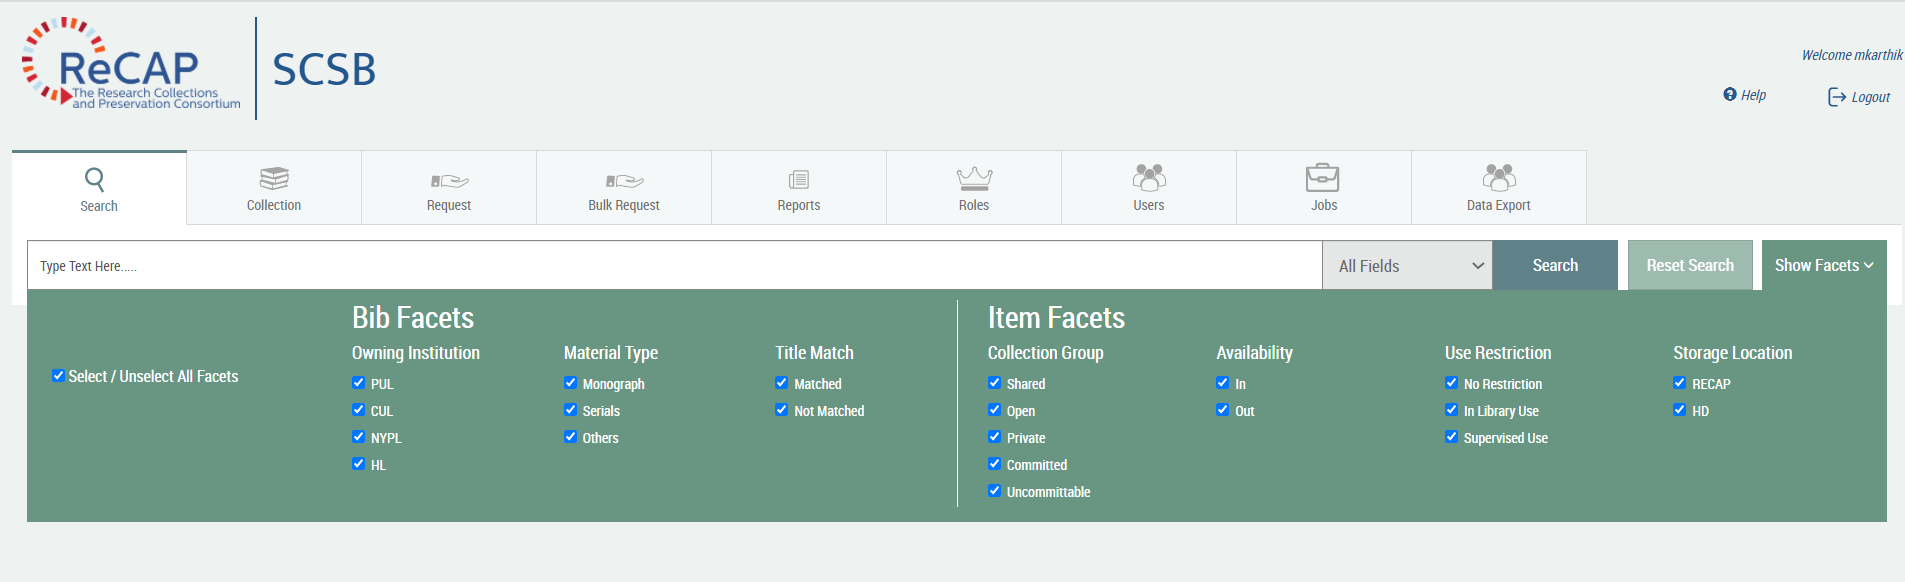
The Show Facets button drops down to reveal a plethora of checkboxes through which the user can further narrow down the search criteria by choosing specific owning institution, Material Type, Collection group designation, Availability, Use restriction and Storage Location. The checkboxes are classified as bib and item facets. Owning institution and Material Type, and Title Match are at the bibliographic level and hence classified as bib facets. Collection Group Designation, Availability status and Use Restriction and Storage Location can vary between items from the same bib and hence classified as item facets. A minimum of one bib facet and one item facet needs to be selected for a successful search.

If no facets are selected, an error message is shown to alert the user that none of the facets are selected.
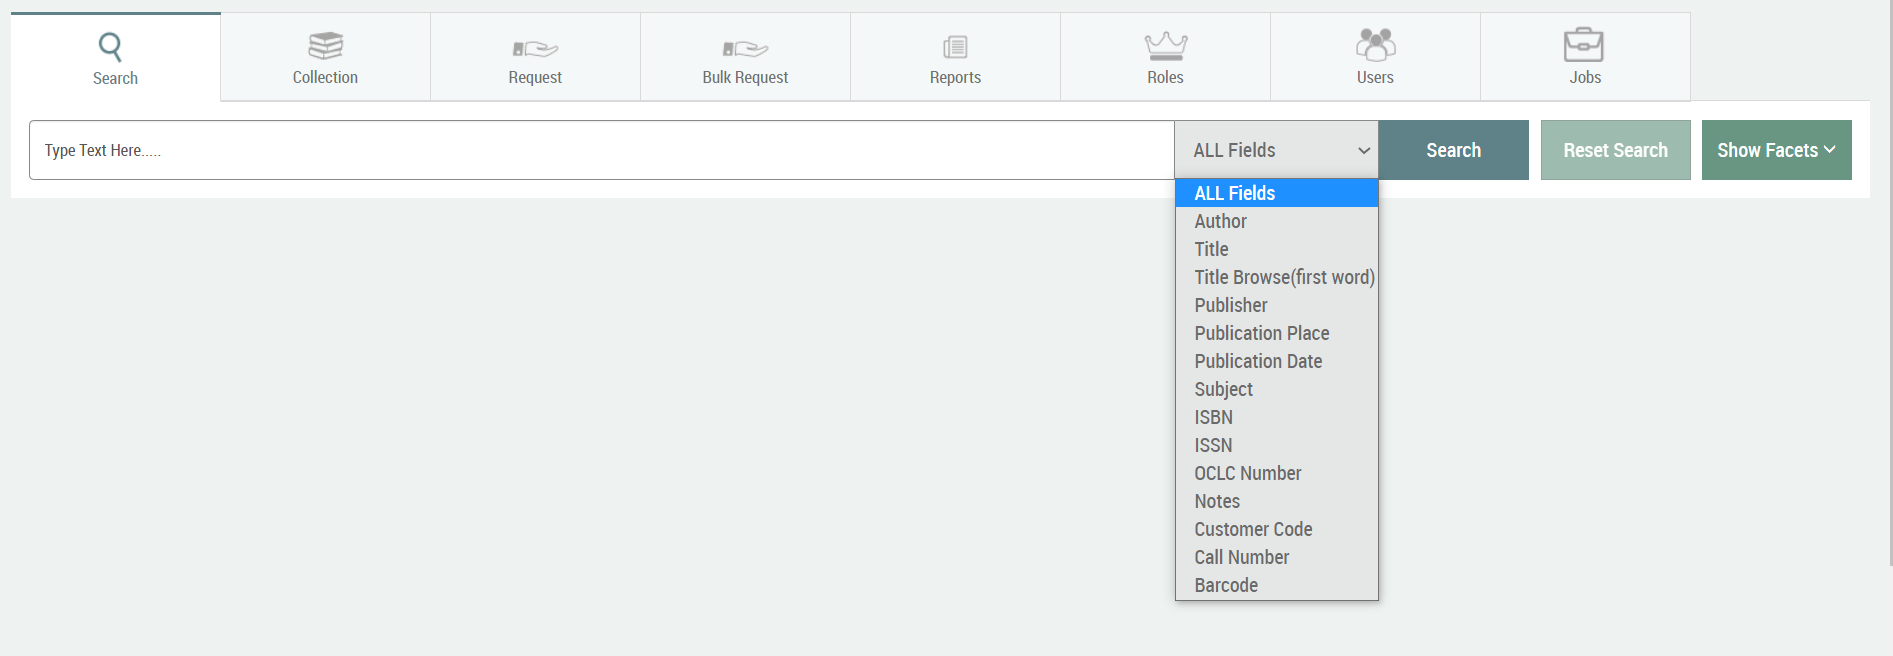
The search can also be limited to specific fields such as Author, Title, Title Browse, Publisher, Publication place, Publication date, Subject, ISBN, ISSN, OCLC number, Notes, Customer code, Call number or Barcode.
Note
SCSB was not envisioned as a platform for discovering items and the most common search that was expected were for known items. Hence, values for search in fields, call number, and barcode need to be the exact value (including the case).
Search Results
Search Results are displayed based on the search criteria specified by the user.
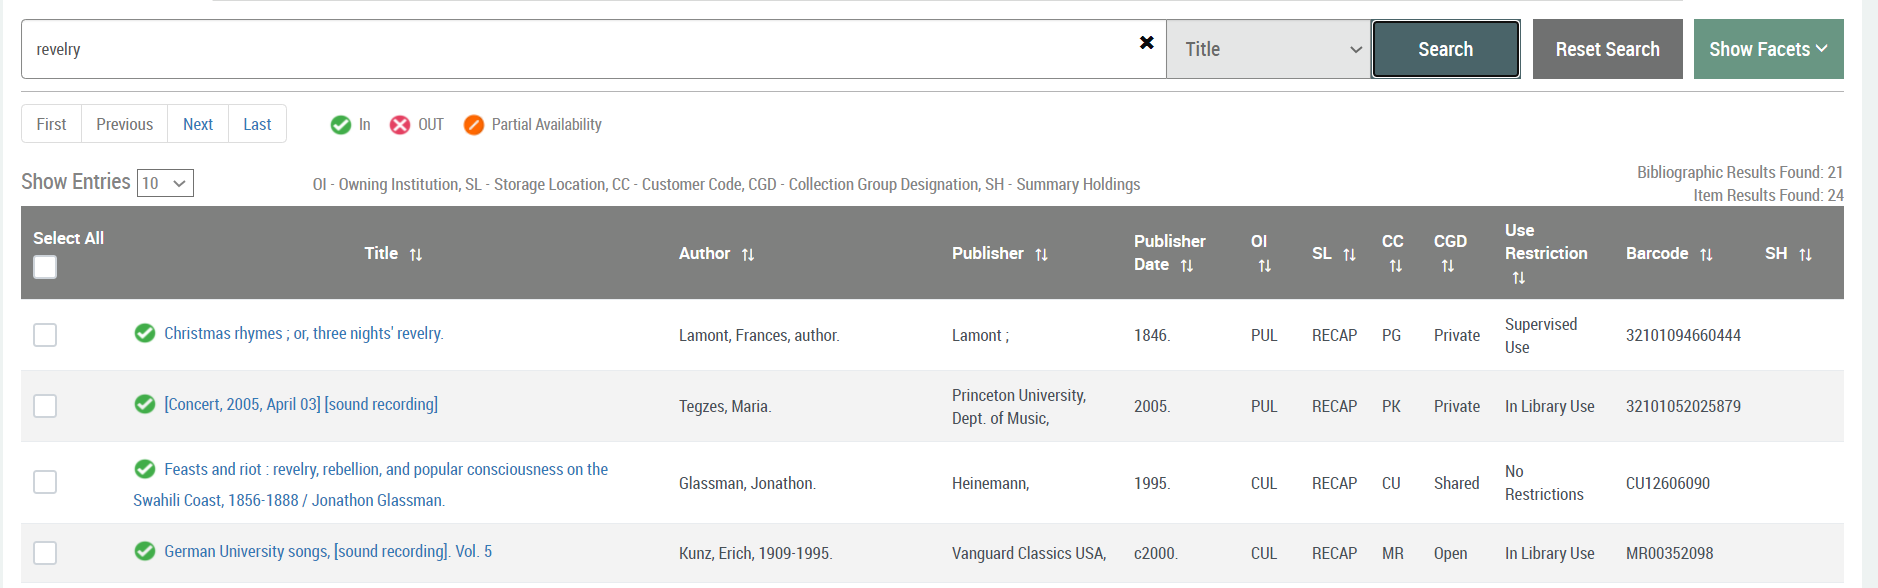
Search Results are presented in a grid which contains results pertaining to the search, in lines that describe the item detail. Above the grid, on the left side, a drop down with label ‘Show Entries’ can be used to limit the number of results to show in the result grid. This is followed by the legend of all acronyms used in grid’s header. On the right corner, above the grid, the number of bibliographic and item results found corresponding to the search made is displayed. Also on the left corner, above the ‘Show Entries’, the user is presented with the pagination buttons - First, Previous, Next and Last. These can be used to navigate between pages of results when there are records that cannot be accommodated in a single page.
The main grid has Eleven distinct columns, clearly distinguished by a header - Title, Author, Publisher, Publisher Date, Owning Institution (OI), Storage Location (SL) , Customer Code (CC), Collection Group Designation (CGD), Use Restriction, Barcode and Summary Holdings (SH). The availability of the items is denoted by a ‘red with a X’ or a ‘green with a tick’ dot next to the checkboxes on each row. Red denotes the item is out and green denotes the item is in ReCAP. The Title and Author columns can be used to sort the contents of the table both in ascending and descending orders by clicking on the arrows on the header.
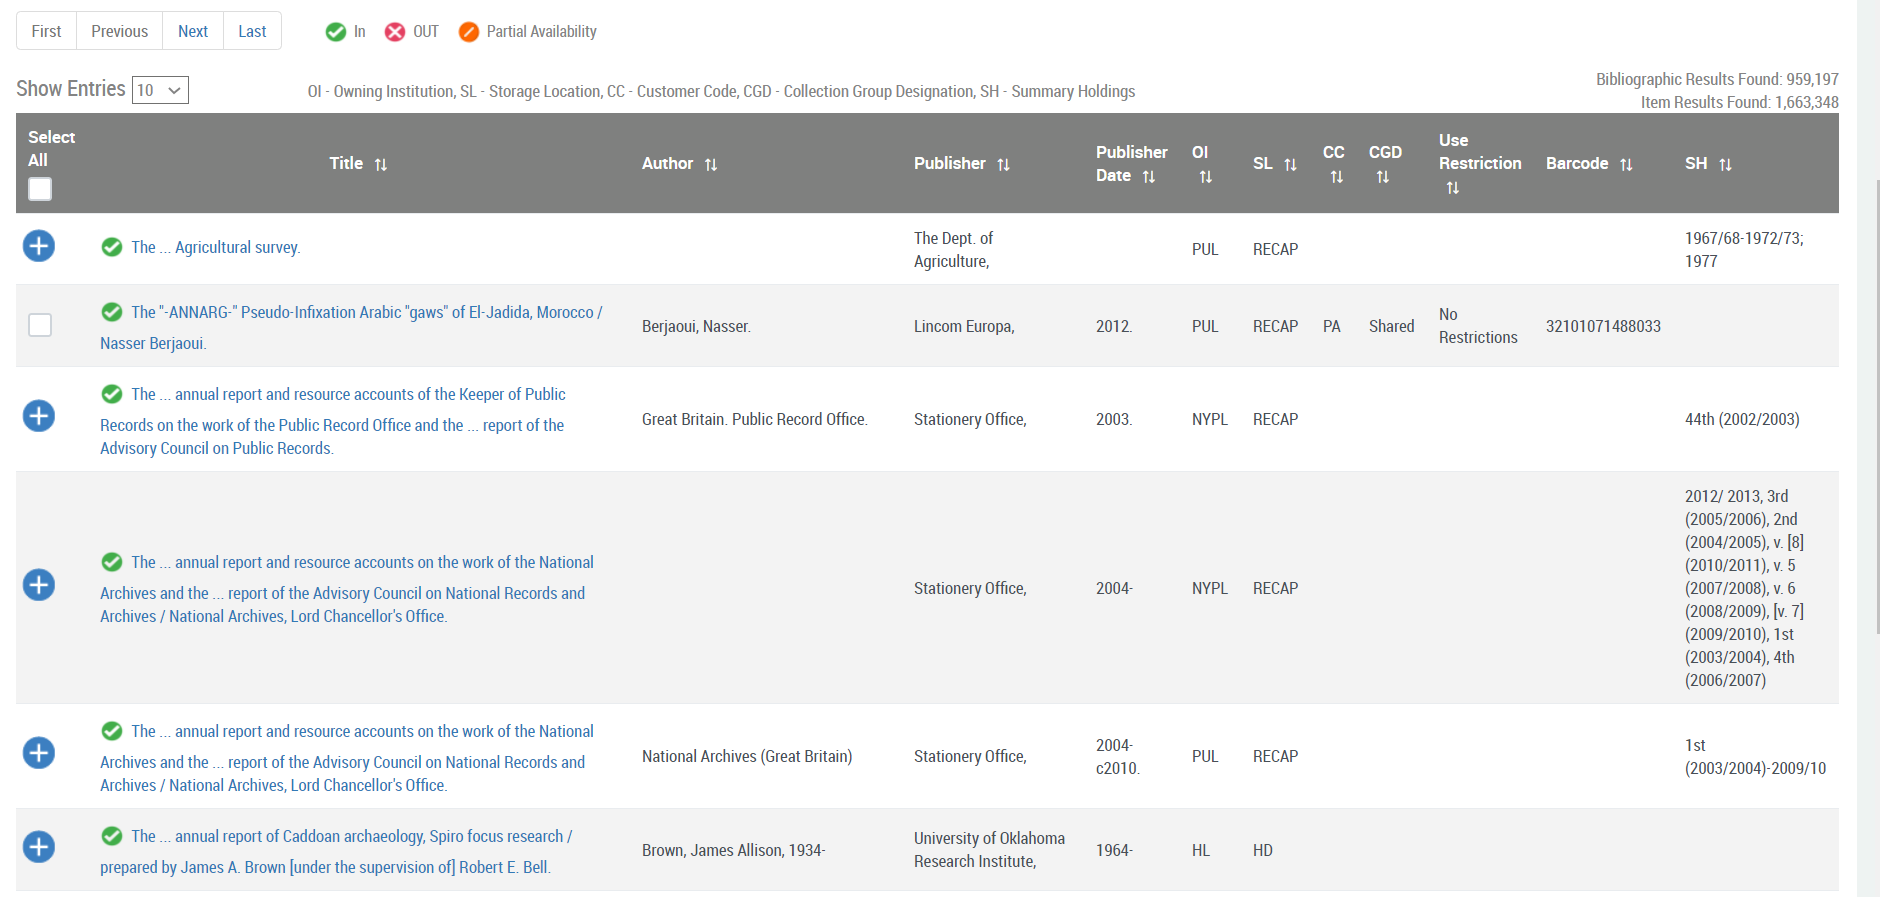
The results follow a 'bibliographic record - item' model where records with only one item record shows up as an individual row. Those bibliographic records where there are multiple items, typically serials, monographic sets, etc., show a plus sign in place of the select check box. Clicking on the plus sign an inner table opens up with the items. The inner table contains Call Number, Chronology and Enumeration information, Customer Code, Collection Group Designation, Use Restriction and Barcode of the items under that bibliographic record. The way Chronology & Enumeration record is stored varies across records and by default this column is sorted as a text. This sometimes results in a not so optimal ordering of records as per volume numbers.
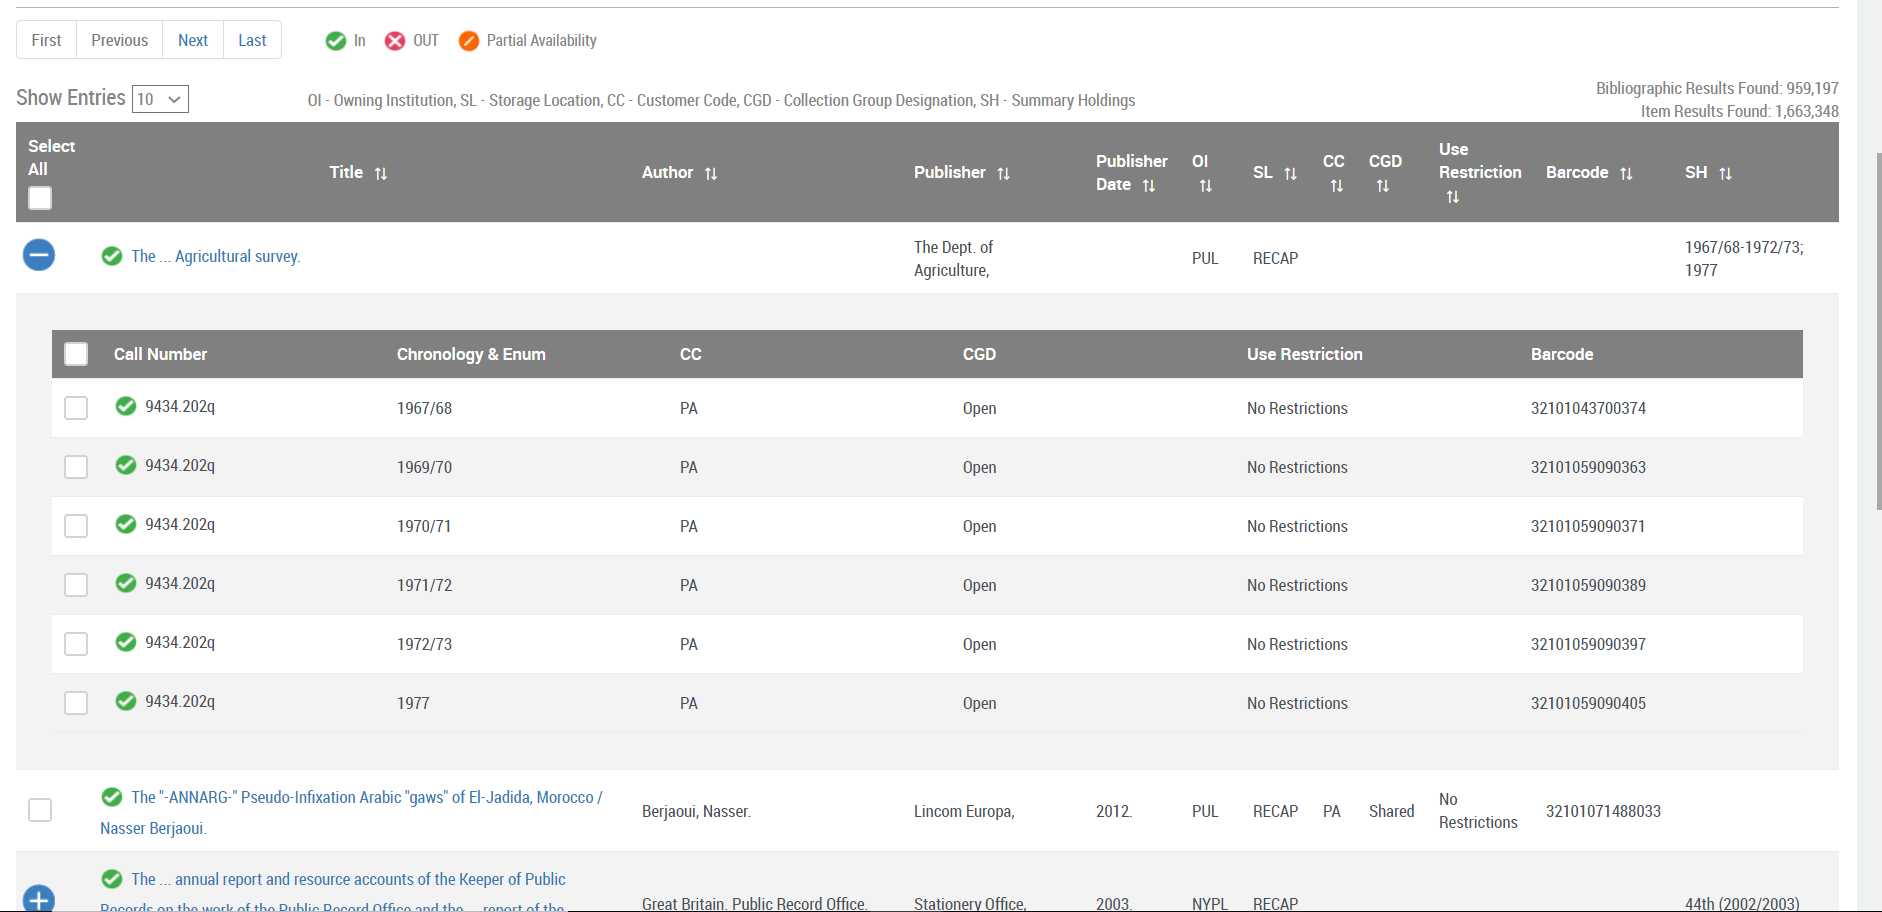
The plus and minus sign act as toggle, switching between displaying and hiding the inner table.
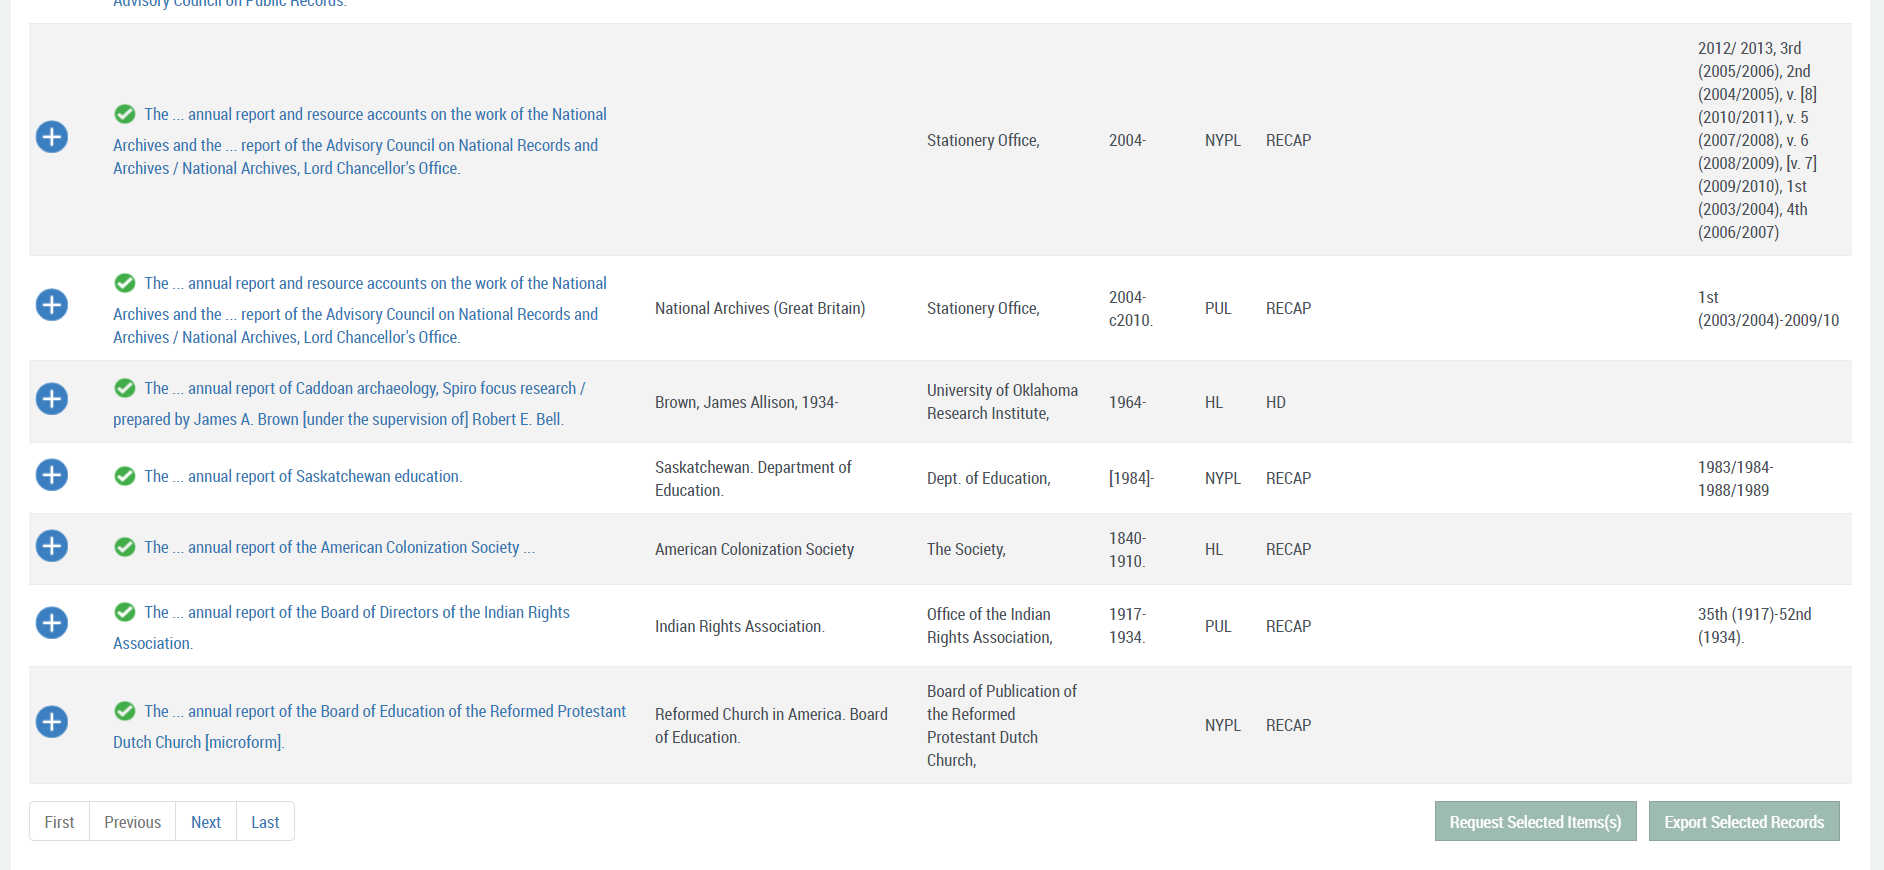
At the bottom of the grid, on the right corner, there are two buttons, Request Selected Item(s) and Export Selected Records. These buttons work in tandem with the checkboxes inside the grid on each row. In case of bibliographic records with multiple items, the checkboxes are placed on the inner table against each item. Clicking on the Select All checkbox selects all records under the header in both main table and the inner table. Using Select All in the main table doesn’t select items under the inner table.
After selection, the Export Selected Records button can be used to export the contents of the grid into a Comma Separated Values (CSV) file. In cases where inner table are to be exported, they must be selected separately. The titles can also be requested from this screen. Clicking on Request Selected Item(s) button directs to the Create Request page and automatically populates the item barcodes of the selected records. However, only items belonging to the same bibliographic record, availability status and customer code will successfully create a request.